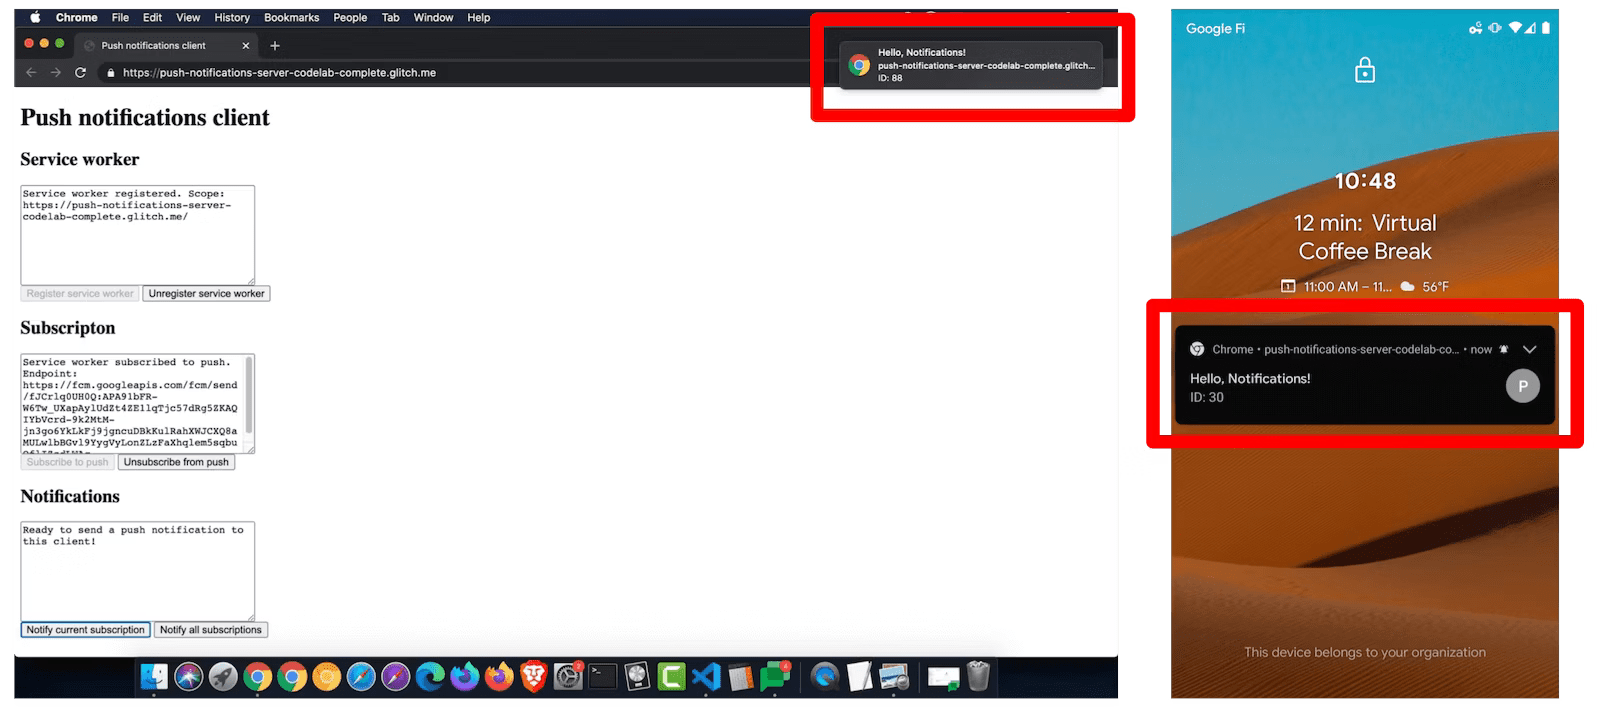
前言 在Web端可以通过Web Push和Notification实现像移动端APP那样的消息推送功能,用户授权之后,即使用户关闭了网页甚至浏览器也可以收到推送通知。
推送模型 消息推送的过程涉及三个角色:客户端浏览器、应用的服务端、推送服务。前两个角色容易理解,是由开发者控制的客户端和服务端。推送服务指的是向浏览器分发消息的后端服务,该服务由浏览器内部指定,开发者无法控制,并且各个浏览器的推送服务是不相同的,不过为了保证调用方式的统一,这些服务都必须遵守相同的规范web push protocol request
用户访问网站时,向用户获取通知的权限,如果用户授权,浏览器会生成一个订阅对象PushSubscription,该对象的由如下字段组成,其中endpoint字段就是推送服务。用户订阅时,客户端需要将该对象序列化并发送至应用的服务端,服务端需要将该对象存入数据库。
1
2
3
4
5
6
7
8
{ "endpoint": "https://fcm.googleapis.com/fcm/send/c1KrmpTuRm…", "expirationTime": null, "keys": { "p256dh": "BGyyVt9FFV…", "auth": "R9sidzkcdf…" } }
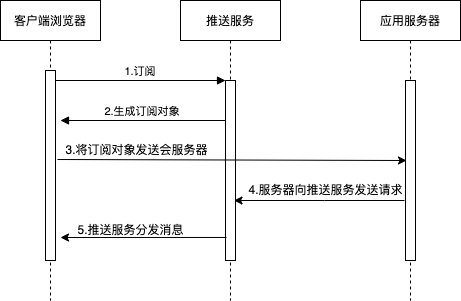
当应用需要向客户端推送消息时,应用的服务端需要按照协议的规范(web push protocol request)向推送服务发起一个HTTP POST请求,将之前保存的PushSubscription发送给推送服务,推送服务收到请求并验证通过之后,会将消息分发给已经订阅了的客户端。推送过程的时序图如下:
应用向用户获取通知权限,用户授权之后,即代表用户订阅了网站,此时浏览器会向推送服务请求。推送服务会“记住”订阅的客户端。
推送服务和客户端之间建立订阅关联,同时浏览器会生成一个订阅对象。
客户端需要将上一步获得的订阅对象序列化,然后通过网络请求发送给应用服务器,服务器必须将该对象保存下来,后续发送消息是需要用到。
当应用服务器需要向客户端发送消息时,需要向推送服务发送POST请求。
推送服务收到请求验证通过后,会将消息分发给客户端。
客户端 推送通知的第一步是用户订阅,这一步需要在客户端完成,主要完成两方面的事情:
获取用户权限。
获取PushSubscription对象,
将PushSubscription对象发送给服务器。
首选创建一个Demo项目,目录结构如下:
1
2
3
./push-notification-demo ├── backend └── frontend
进入frontend目录执行npm init初始化项目,完成后执行npm i http-server -S来安装http-server ,该包用于启动一个简单的http服务。然后创建index.html、index.js、service-worker.js,初始内容分别如下:
1
2
3
4
5
6
7
8
9
10
11
12
13
14
15
16
17
18
19
20
21
22
23
24
25
26
27
28
29
<!DOCTYPE html> <html lang="en"> <head> <meta charset="UTF-8"> <meta http-equiv="X-UA-Compatible" content="IE=edge"> <meta name="viewport" content="width=device-width, initial-scale=1.0"> <title>Document</title> <style> button { display: block; margin-bottom: 10px; min-width: 48px; min-height: 48px; } </style> </head> <body> <h1>Push notifications client</h1> <fieldset> <legend>Profile:</legend> <div> <input type="checkbox" id="subscribeCheckbox"> <label for="subscribeCheckbox">Subscribe to push</label> </div> </fieldset> <script src="index.js"></script> </body> </html>
1
2
3
4
5
6
7
8
9
10
11
12
13
14
15
16
17
18
19
20
21
22
function registerServiceWorker() { return navigator.serviceWorker .register('/service-worker.js') .then(function (registration) { console.log('Service worker successfully registered.'); return registration; }) .catch(function (err) { console.error('Unable to register service worker.', err); }); } (async function main() { if (!('serviceWorker' in navigator)) { return; } if (!('PushManager' in window)) { return; } const serviceWorkerRegistration = await registerServiceWorker(); })();
service-worker.js的内容暂时只有一行console.log('service worker')。
1
2
3
4
"scripts": { "start": "http-server ./ -p 3000", "test": "echo \"Error: no test specified\" && exit 1" }
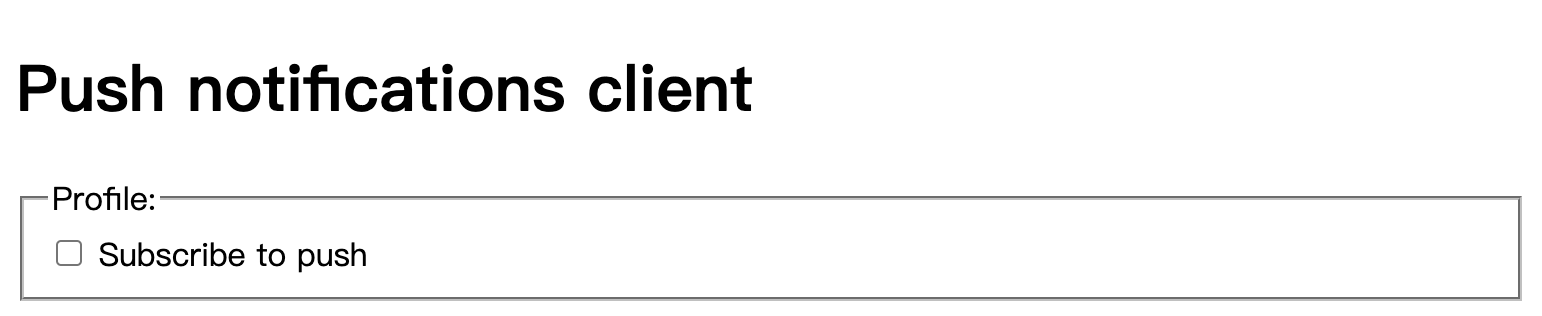
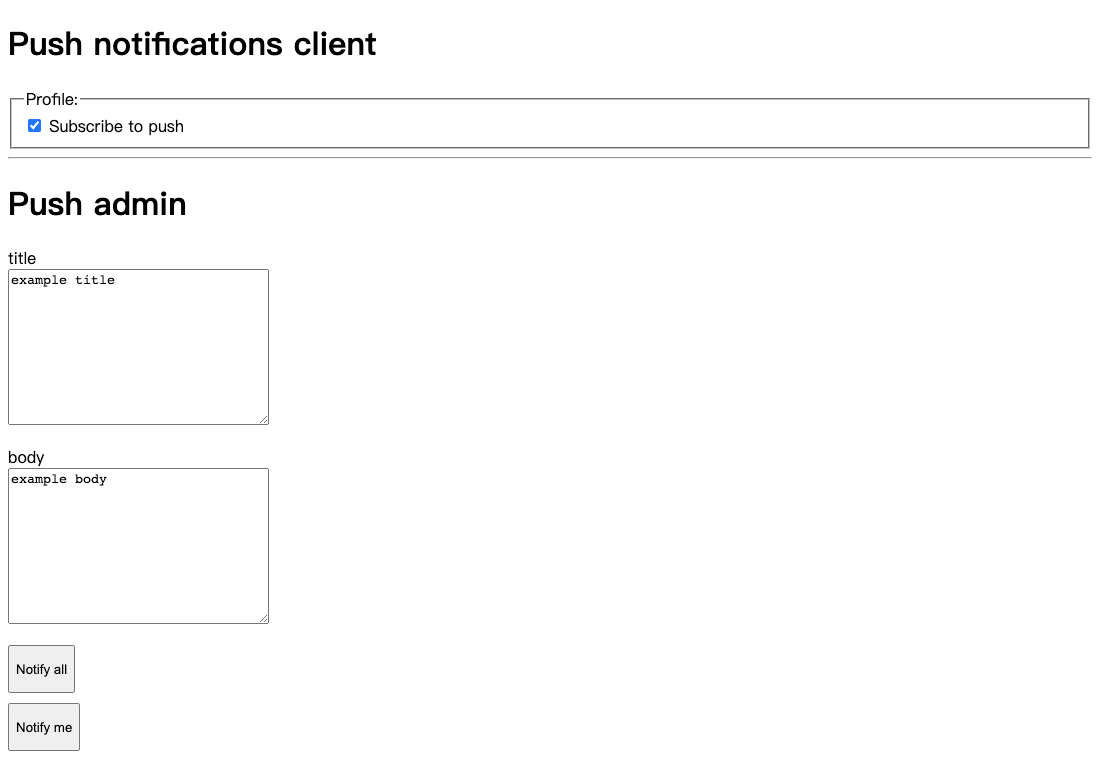
进入frontend目录执行npm run start启动项目后,在浏览器中访问http://127.0.0.1:3000/index.html 可以看到如下:
然后为单选框绑定事件处理,当用户勾选时向用户获取权限,修改index.js文件:
1
2
3
4
5
6
7
8
9
10
11
12
13
14
15
16
17
function handleUI(serviceWorkerRegistration) { const subscribeCheckbox = document.getElementById('subscribeCheckbox'); // 用户已经订阅,需要将单选框设置为勾选状态 checkSubscription(serviceWorkerRegistration).then((isChecked) => { subscribeCheckbox.checked = isChecked; }); subscribeCheckbox.addEventListener('input', async (event) => { const checked = event.target.checked; if (checked) { // 订阅 // 获取权限 await askPermission(); const sub = await subscribeUserToPush(serviceWorkerRegistration); sendSubscriptionToBackEnd(sub) } }); }
获取权限的代码如下:
1
2
3
4
5
6
7
8
9
10
11
12
13
14
15
function askPermission() { return new Promise(function (resolve, reject) { const permissionResult = Notification.requestPermission(function (result) { resolve(result); }); if (permissionResult) { permissionResult.then(resolve, reject); } }).then(function (permissionResult) { if (permissionResult !== 'granted') { throw new Error("We weren't granted permission."); } }); }
通过调用Notification.requestPermission()来向用户获取权限,我们将其包装成Promise,当用户点击允许时,permissionResult的值将会是granted。
接下来是获取浏览器返回的PushSubscription对象:
1
2
3
4
5
6
7
8
9
10
11
12
13
14
15
16
17
18
function subscribeUserToPush(serviceWorkerRegistration) { return serviceWorkerRegistration.pushManager.getSubscription().then((subscription) => { if (subscription !== null) { return subscription; } const subscribeOptions = { userVisibleOnly: true, applicationServerKey: urlBase64ToUint8Array(PUBLIC_KEY), }; return serviceWorkerRegistration.pushManager.subscribe(subscribeOptions); }).then(function (pushSubscription) { console.log( 'Received PushSubscription: ', JSON.stringify(pushSubscription), ); return pushSubscription; });; }
以上的核心代码是调用serviceWorkerRegistration.pushManager.getSubscription(),主要先检查浏览器是否已经存在订阅,调用PushManager API 中的getSubscription()方法,如果不存在,则调用pushManager.subscribe(subscribeOptions)实现用户订阅。subscribe()方法接收一个对象,该对象有两个选项。
userVisibleOnly选项 该选项用于告知浏览器,当推送消息到达时,浏览器是否需要展示通知提示框,即是否允许静默推送。出于安全性的考虑,目前大多数浏览器只支持该选项传入true,在Chrome浏览器中如果传入false时,会有报错信息。后面会讲解接收到消息时,如何使用Notification的API展示通知提示框。
applicationServerKey选项 在解释该选项之前,我们需要了解一个概念:应用服务器密钥(application server keys),该密钥是一个包含了公钥和私钥的密钥对。该密钥对于应用来说是唯一的,即一个应用只能有一个密钥对。传给applicationServerKey是密钥对的公钥,当调用subscribe()方法时,浏览器会把公钥发送给推送服务。推送服务使用该公钥生成一个唯一的endpoint。endpoinet字段随浏览器生成PushSubscription对象返回给开发者。
上文提到,当应用需要向客户端推送消息时,应用的服务端必须向推送服务发送一个POST请求,这个请求的请求头必须包含Authorization字段,该字段要求使用私钥对你发送的数据进行签名,同时还需要将浏览器返回的PushSubscription发送给推送服务,推送服务在收到推送请求时,推送经过一系列的验证,能够知道哪个应用在发送消息。该机制确保只有你的应用能够合法的向已经订阅了的用户发送消息。
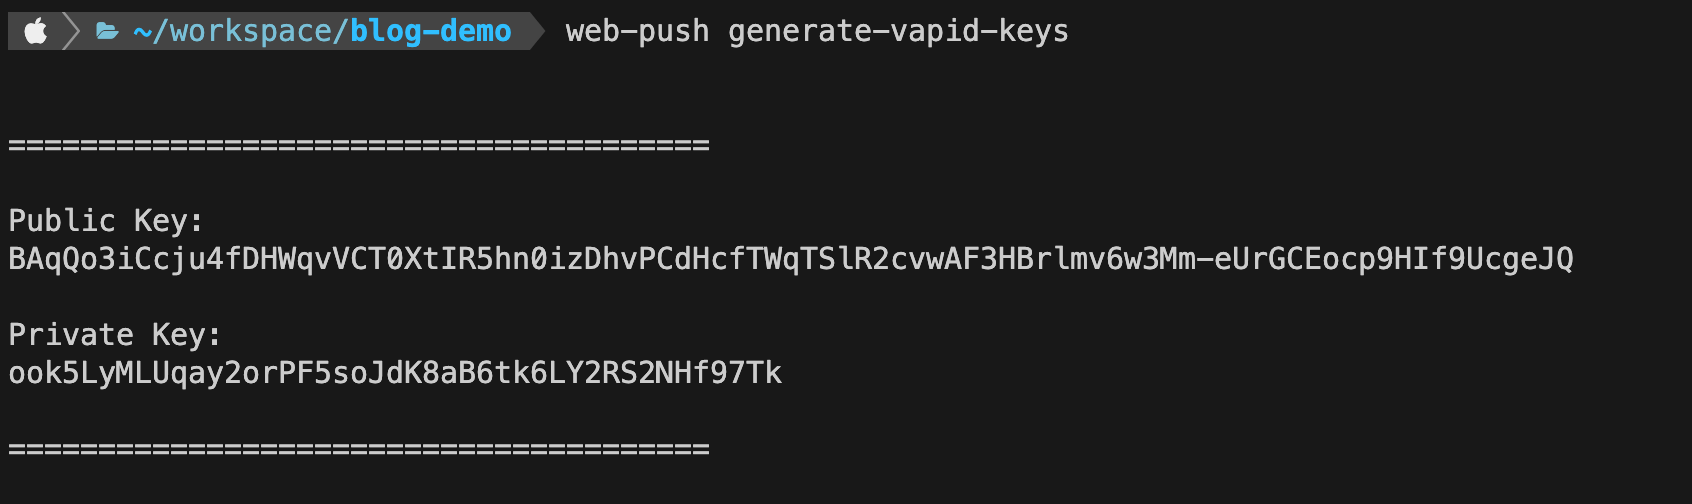
你可以访问 web-push-codelab.glitch.me 创建应用服务器密钥,或者通过web-push的命令行 工具来生成。
1
2
npm install -g web-push web-push generate-vapid-keys
该密钥对只需要生成一次,私钥需要妥善的保管在服务端,并确保其安全。公钥可以随意的分发给客户端。
1 const PUBLIC_KEY = 'BAqQo3iCcju4fDHWqvVCT0XtIR5hn0izDhvPCdHcfTWqTSlR2cvwAF3HBrlmv6w3Mm-eUrGCEocp9HIf9UcgeJQ'
当用户已经订阅,我们还需要将单选框设置为勾选状态:
1
2
3
4
5
6
7
async function checkSubscription(serviceWorkerRegistration) { const subscription = await serviceWorkerRegistration.pushManager.getSubscription(); if (subscription === null) { return false; } return true; }
同时需要urlBase64ToUint8Array工具方法对公钥进行转换
1
2
3
4
5
6
7
8
9
10
11
12
function urlBase64ToUint8Array(base64String) { const padding = '='.repeat((4 - base64String.length % 4) % 4); const base64 = (base64String + padding) .replace(/\-/g, '+') .replace(/_/g, '/'); const rawData = window.atob(base64); const outputArray = new Uint8Array(rawData.length); for (let i = 0; i < rawData.length; ++i) { outputArray[i] = rawData.charCodeAt(i); } return outputArray; };
服务端 下一步我们需要将调用subscribeUserToPush(serviceWorkerRegistration)方法返回的PushSubscription对象发送给服务端并存储起来。
1
2
3
cd backend npm init npm i express body-parser cors dotenv nedb -S
由于需要使用数据库存储PushSubscription,所以这里使用本地数据库nedb 作为演示。我们将私钥存入.env文件,所以我们需要dotenv来读取私钥的值。在backend目录下创建index.js:
1
2
3
4
5
6
7
8
9
10
11
12
13
14
15
16
17
18
19
20
21
22
23
24
25
26
27
28
29
30
31
32
33
34
35
36
37
38
39
40
41
42
43
44
45
46
47
48
49
50
51
52
53
54
55
56
57
58
59
const express = require('express'); const cors = require('cors'); const bodyParser = require('body-parser'); const Datastore = require('nedb'); const dotenv = require('dotenv'); dotenv.config(); const db = new Datastore({filename: 'subscription.db'}); db.loadDatabase(); const app = express(); app.use(cors()); app.use(bodyParser.json()); const port = 4000; function saveSubscriptionToDatabase(subscription) { return new Promise(function (resolve, reject) { db.insert(subscription, function (err, newDoc) { if (err) { reject(err); return; } resolve(newDoc._id); }); }); } app.get('/', async (req, res) => res.send('hello world')); app.post('/api/save-subscription/', async (req, res) => { if (!req.body || !req.body.endpoint) { res.status(400); res.json({ error: { code: '400', message: 'Subscription must have an endpoint.', }, }); return; } return saveSubscriptionToDatabase(req.body) .then(function (subscriptionId) { res.json({data: {success: true, subscriptionId}}); }) .catch(function (err) { res.status(500); res.json( { error: { code: '500', message: 'save subscription error', }, } ); }); }); app.listen(port, () => console.log(`Example app listening on port ${port}!`));
为了调试方便,我们在backend/package.json中创建一下启动脚本,执行npm i nodeman -D安装nodeman。
1 "start": "nodemon --watch index.js"
创建.env文件并将之前生成公钥和私钥存储在该文件中:
1
2
PRIVATE_KEY=ook5LyMLUqay2orPF5soJdK8aB6tk6LY2RS2NHf97Tk PUBLIC_KEY=BAqQo3iCcju4fDHWqvVCT0XtIR5hn0izDhvPCdHcfTWqTSlR2cvwAF3HBrlmv6w3Mm-eUrGCEocp9HIf9UcgeJQ
此时项目的目录结构如下:
1
2
3
4
5
6
7
8
9
10
11
12
13
./push-notification-demo ├── backend │ ├── index.js │ ├── node_modules │ ├── package-lock.json │ └── package.json └── frontend ├── index.html ├── index.js ├── node_modules ├── package-lock.json ├── package.json └── service-worker.js
在backend目录下执行npm run start,并访问http://localhost:4000/ ,可以看到打印的hello world。index.js中我们创建接口/api/save-subscription/,并将接收到的PushSubscription存入数据库中。在frontend/index.js中调用该接口上传PushSubscription对象。
1
2
3
4
5
6
7
8
9
10
11
12
13
14
15
16
17
18
19
20
21
22
23
24
25
26
27
28
29
30
31
32
33
34
35
36
37
38
39
function sendSubscriptionToBackEnd(subscription) { return fetch('http://localhost:4000/api/save-subscription/', { method: 'POST', headers: { 'Content-Type': 'application/json', }, body: JSON.stringify(subscription), }) .then(function (response) { if (!response.ok) { throw new Error('Bad status code from server.'); } return response.json(); }) .then(function (responseData) { if (!(responseData.data && responseData.data.success)) { throw new Error('Bad response from server.'); } }); } function handleUI(serviceWorkerRegistration) { const subscribeCheckbox = document.getElementById('subscribeCheckbox'); // 用户已经订阅,需要将单选框设置为勾选状态 checkSubscription(serviceWorkerRegistration).then((isChecked) => { subscribeCheckbox.checked = isChecked; }); subscribeCheckbox.addEventListener('input', async (event) => { const checked = event.target.checked; if (checked) { // 订阅 await askPermission(); const sub = await subscribeUserToPush(serviceWorkerRegistration); // 将订阅对象存入数据库 sendSubscriptionToBackEnd(sub); } }); }
推送消息 以上工作完成后,接下来需要实现消息推送,我们frontend/index.html中创建一个模拟的Push管理面板,修改frontend/index.html
1
2
3
4
5
6
7
8
9
10
11
12
13
14
15
16
17
18
19
20
<h1>Push admin</h1> <dl> <dt> <label for="title">title</label> </dt> <dt> <textarea id="msgTitle" cols="30" rows="10">example title</textarea> </dt> </dl> <dl> <dt> <label for="msgBody">body</label> </dt> <dt> <textarea id="msgBody" cols="30" rows="10">example body</textarea> </dt> </dl> <button id="notifyAll"> Notify all </button>
1
2
3
4
5
6
7
8
9
10
11
12
13
14
15
16
17
18
19
20
21
22
23
24
25
26
27
28
29
30
31
32
33
34
35
36
37
38
39
40
41
42
43
44
45
46
47
48
49
50
51
52
53
54
55
56
57
58
59
60
61
62
63
64
65
function sendNotificationToAll(message) { return fetch('http://localhost:4000/api/notify-all/', { method: 'POST', headers: { 'Content-Type': 'application/json', }, body: JSON.stringify(message), }) .then(function (response) { if (!response.ok) { throw new Error('Bad status code from server.'); } return response.json(); }) .then(function (responseData) { if (!(responseData.data && responseData.data.success)) { throw new Error('Bad response from server.'); } }); } function sendNotificationToMe(subscription, message) { return fetch('http://localhost:4000/api/notify-me/', { method: 'POST', headers: { 'Content-Type': 'application/json', }, body: JSON.stringify({ subscription, message }), }) .then(function (response) { if (!response.ok) { throw new Error('Bad status code from server.'); } return response.json(); }) .then(function (responseData) { if (!(responseData.data && responseData.data.success)) { throw new Error('Bad response from server.'); } }); } const notifyAll = document.getElementById('notifyAll'); const notifyMe = document.getElementById('notifyMe'); notifyAll.addEventListener('click', (event) => { const title = document.getElementById('msgTitle').value; const body = document.getElementById('msgBody').value; if (title && body) { // 向所有订阅用户发通知 sendNotificationToAll({ title: title, body: body }); } }); notifyMe.addEventListener('click', async () => { const subscription = await serviceWorkerRegistration.pushManager.getSubscription(); if (subscription) { const title = document.getElementById('msgTitle').value; const body = document.getElementById('msgBody').value; if (title && body) { // 向单个订阅用户发通知 sendNotificationToMe(subscription, { title: title, body: body }); } } });
接下来在backend/index.js添加/api/notify-me/和/api/notify-all/两个路由:
1
2
3
4
5
6
7
8
9
10
11
12
13
14
15
16
17
18
19
20
21
22
23
24
25
26
27
28
29
30
31
32
33
34
35
36
37
38
39
40
41
42
43
44
45
46
47
48
49
50
51
52
53
54
55
56
57
58
59
60
61
62
63
64
65
66
67
68
69
70
function findAllSubscription() { return new Promise((resolve, reject) => { db.find({}, function(err, docs) { if (err) { reject(err) } resolve(docs); }); }); } app.post('/api/notify-all/', async (req, res) => { const { title, body } = req.body; const dataToSend = { title: title, body: body, icon: 'https://hk.trip.com/trip.ico' }; try { const subscriptions = await findAllSubscription(); for (let i = 0; i < subscriptions.length; i++) { const subscription = subscriptions[i]; await triggerPushMsg(subscription, dataToSend); } res.json({ data: { success: true } }); } catch (err) { res.status(500); res.json({ error: { message: `Send all subscriptions failed: ` + `'${err.message}'` } }); } }); function findSubscription(endpoint) { return new Promise((resolve, reject) => { db.find({ endpoint }, function(err, docs) { if (err) { reject(err) } if (docs.length >= 1) { resolve(docs[0]); } else { resolve(null); } }); }); } app.post('/api/notify-me/', async (req, res) => { const { message, subscription } = req.body; const doc = await findSubscription(subscription.endpoint); if (doc) { const { title, body } = message; const dataToSend = { title: title, body: body, icon: 'https://hk.trip.com/trip.ico' }; await triggerPushMsg(subscription, dataToSend); res.json({ data: { success: true } }); return; } res.status(500); res.json({ data: { success: false } }); });
以上代码最终调用triggerPushMsg方法最终实现消息推送,前面讲过推送消息时需要向推送服务(endpoint字段所指向的地址)发送POST请求。推送服务是由浏览内置的,开发者无法控制推送服务。为了规范推送流程,所有的推送服务都必须遵守相同的规范,该规范称为Web Push Protocol 。规范统一规定了POST请求的格式,所以开发者并不需要关心推送服务的地址是什么,只需要按照规范的要求发送请求即可。这里可以看到对应语言的工具库 。NodeJS中,我们可以使用web-push 。
首先在backend中安装该npm包
1 npm install web-push --save
前面提到,发送消息时,需要提供应用服务器密钥(application server keys, 又称之为VAPID密钥)。
1
2
3
4
5
6
7
8
9
10
11
12
13
14
15
16
17
18
19
20
21
22
23
24
25
26
27
28
29
30
31
32
const vapidKeys = { publicKey: process.env.PUBLIC_KEY, privateKey: process.env.PRIVATE_KEY, }; // 使用应用服务器密钥初始化webpush webpush.setVapidDetails( 'mailto:demo@test.com', vapidKeys.publicKey, vapidKeys.privateKey, ); function deleteSubscription(id) { return new Promise((resolve, reject) => { db.remove({ _id: id }, {}, function (err, numRemoved) { if (err) { reject(err); } resolve(id); }); }); } function triggerPushMsg (subscription, dataToSend) { // 国内调试需要添加本地代理proxy参数 return webpush.sendNotification(subscription, JSON.stringify(dataToSend), { proxy: 'http://127.0.0.1:7890' }).catch((err) => { if (err.statusCode === 404 || err.statusCode === 410) { return deleteSubscription(subscription._id); } else { throw err; } }); };
以上代码分别调用webpush.setVapidDetails()和webpush.sendNotification()完成消息推送。本质上web-push库按照协议的规范 向推送服务发送了一个POST请求,如果请求失败,需要判断失败状态码确认失败的原因,以上例子判断状态码如果是404或者410,即说明该订阅对象已经过期,需要将订阅对象从数据库中删除。
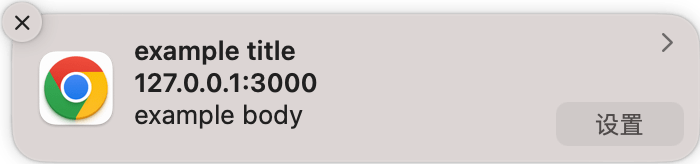
展示通知 推送功能已经完成的差不多了,接下来我们回到浏览器端,当浏览器收到推送服务的分发的消息时,还需要展示通知提框。修改frontend/service-worker.js中的代码:
1
2
3
4
5
6
7
8
self.addEventListener('push', (event) => { const notification = event.data.json(); const promiseChain = self.registration.showNotification( notification.title, notification ); event.waitUntil(promiseChain); });
在service worker中我们只需要监听push事件,然后调用self.registration.showNotification()展示通知。该函数返回promise对象。然后我们调用event.waitUntil(promiseChain),该函数的作用是告知浏览器在promise对象resolve之前不要结束service worker的运行。当浏览器处于关闭状态时,如果有新的推送消息到达客户端,浏览器的service worker进程将被唤醒,push事件回调函数执行结束之后,该进程会再次进入休眠状态。但如果你想在回调函数执行一些异步操作,你需要告知浏览器在异步操作结束之前保持service worker进程运行状态。这就是event.waitUntil()函数的含义。
1
2
3
4
5
6
7
8
9
10
11
12
13
14
15
16
17
18
19
20
self.addEventListener('push', (event) => { const notification = event.data.json(); const notifyPromise = self.registration.showNotification( notification.title, notification ); // 上报推送成功事件 const reportPromise = fetch('http://localhost:4000/api/report-push', { method: 'POST', headers: { 'Content-Type': 'application/json', }, body: notification, }); const promiseChain = Promise.all([reportPromise, notifyPromise]); // 以上两个promise都成功时,service worker才会执行结束 event.waitUntil(promiseChain); });
通过上面的代码,service worker将一直保持运行状态,直到数据上报的异步请求成功,所以当push回调函数内有耗时的异步代码时,为了保持耗时的异步任务执行,我们需要调用event.waitUntil(promiseChain)。
下一章节我们看一下如何设置通知框的其他行为。
参考资料